游戏人生
首页
(current)
GameDevTools
登陆
|
注册
个人中心
注销
ImGui-WebAssembly
Introduction
Introduction
前言
前言
1. SuperVision介绍
1. SuperVision介绍
1.1 使用Box和Label标记图片物体
1.2 导出检测结果
1.3 过滤检测结果
1.4 检测小物体
1.5 踪视频中的对象
1.6 处理数据集
代码资源下载
点我下载
Github
点赞、收藏、关注
目录
<< 1.4 检测小物体
1.6 处理数据集 >>
## 追踪视频中的对象 ```text 「supervision book」是一本开源电子书,PDF/随书代码/资源下载: https://github.com/ThisisGame/supervision_book ``` SuperVision可以将视频展开为一帧一帧的图片,然后对每帧图片进行推理,添加标注,然后再合并为视频。 先下载测试视频: ```python #file:files\supervision\download_people_walking_mp4.py from supervision.assets import download_assets, VideoAssets download_assets(VideoAssets.PEOPLE_WALKING) ``` <video src="https://media.roboflow.com/supervision/video-examples/people-walking.mp4" controls width="80%"></video> ### 标注视频人物 对视频中的人物进行标注 ```python #file: files\supervision\detect_video_objects.py ## 给检测到的对象添加方框 import numpy as np import supervision as sv from ultralytics import YOLO model = YOLO("yolov8n.pt") box_annotator = sv.BoundingBoxAnnotator() # 使用YOLOv8模型检测每一帧图片中的对象,并在每个检测到的对象周围添加方框。 def callback(frame: np.ndarray, _: int) -> np.ndarray: results = model(frame)[0] detections = sv.Detections.from_ultralytics(results) return box_annotator.annotate(frame.copy(), detections=detections) # 将视频拆分为一帧一帧的图片,调用callback函数处理每一帧,然后合成视频。 sv.process_video( source_path="people-walking.mp4", target_path="detect_video_objects.mp4", callback=callback ) ``` <video src="https://media.roboflow.com/supervision/video-examples/how-to/track-objects/run-inference.mp4" controls width="80%"></video> ### 识别并标注TrackingID 对视频中的人物进行识别,并使用`sv.ByteTrack`功能对每个识别的人物分配TrackingID,然后标注出来。 ```python #file:files\supervision\annotate_video_objects_with_tracking_id.py ## 给检测到的对象添加方框并显示Tracking ID,Tracking ID是一个唯一的标识符,用于跟踪视频中每个对象的运动轨迹。 import numpy as np import supervision as sv from ultralytics import YOLO model = YOLO("yolov8n.pt") tracker = sv.ByteTrack() box_annotator = sv.BoundingBoxAnnotator() label_annotator = sv.LabelAnnotator() # 使用YOLOv8模型检测每一帧图片中的对象,并在每个检测到的对象周围添加方框。 def callback(frame: np.ndarray, _: int) -> np.ndarray: results = model(frame)[0] detections = sv.Detections.from_ultralytics(results) detections = tracker.update_with_detections(detections)# 更新检测结果以包含跟踪ID labels = [ f"#{tracker_id} {results.names[class_id]}" for class_id, tracker_id in zip(detections.class_id, detections.tracker_id) ] annotated_frame = box_annotator.annotate( frame.copy(), detections=detections) return label_annotator.annotate( annotated_frame, detections=detections, labels=labels)#显示Tracking ID # 将视频拆分为一帧一帧的图片,调用callback函数处理每一帧,然后合成视频。 sv.process_video( source_path="people-walking.mp4", target_path="annotate_video_objects_with_tracking_id.mp4", callback=callback ) ``` <video src="https://media.roboflow.com/supervision/video-examples/how-to/track-objects/annotate-video-with-tracking-ids.mp4" controls width="80%"></video> ### 绘制追踪轨迹线 上面用`sv.ByteTrack`给每个识别的人物添加了TrackingID,并且标注出来了。 接下来使用`sv.TraceAnnotator`来绘制人物运动轨迹线。 ```python #file:files\supervision\annotate_video_objects_with_traces.py ## 给检测到的对象添加方框并显示Tracking ID,并绘制视频中每个对象的运动轨迹。 import numpy as np import supervision as sv from ultralytics import YOLO model = YOLO("yolov8n.pt") tracker = sv.ByteTrack() box_annotator = sv.BoundingBoxAnnotator() label_annotator = sv.LabelAnnotator() trace_annotator = sv.TraceAnnotator() # 使用YOLOv8模型检测每一帧图片中的对象,并在每个检测到的对象周围添加方框。 def callback(frame: np.ndarray, _: int) -> np.ndarray: results = model(frame)[0] detections = sv.Detections.from_ultralytics(results) detections = tracker.update_with_detections(detections)# 更新检测结果以包含跟踪ID labels = [ f"#{tracker_id} {results.names[class_id]}" for class_id, tracker_id in zip(detections.class_id, detections.tracker_id) ] annotated_frame = box_annotator.annotate(frame.copy(), detections=detections) annotated_frame = label_annotator.annotate(annotated_frame, detections=detections, labels=labels)#显示Tracking ID return trace_annotator.annotate(annotated_frame, detections=detections) # 将视频拆分为一帧一帧的图片,调用callback函数处理每一帧,然后合成视频。 sv.process_video( source_path="people-walking.mp4", target_path="annotate_video_objects_with_traces.mp4", callback=callback ) ``` <video src="https://media.roboflow.com/supervision/video-examples/how-to/track-objects/annotate-video-with-traces.mp4" controls width="80%"></video> ### 人物骨骼识别追踪 SuperVision可以利用`yolov8m-pose.pt`模型来识别人物Pose,然后绘制标注人体关节骨骼。 先下载滑雪视频: ```python #file:files\supervision\download_skiing_video.py ## 下载滑雪视频 from supervision.assets import download_assets, VideoAssets download_assets(VideoAssets.SKIING) ``` <video src="https://media.roboflow.com/supervision/video-examples/how-to/track-objects/skiing-hd.mp4" controls width="80%"></video> 下面使用`EdgeAnnotator` 和 `VertexAnnotator` 来绘制识别到的人体关节。 ```python #file:files\supervision\keypoint_detection.py ## 检测人物骨骼、关节点,并绘制骨架 import numpy as np import supervision as sv from ultralytics import YOLO model = YOLO("yolov8m-pose.pt") edge_annotator = sv.EdgeAnnotator() #边的标注器 vertex_annotator = sv.VertexAnnotator() #点的标注器 def callback(frame: np.ndarray, _: int) -> np.ndarray: results = model(frame)[0] key_points = sv.KeyPoints.from_ultralytics(results) #从YOLO获取识别到的关节点 annotated_frame = edge_annotator.annotate(frame.copy(), key_points=key_points) #先绘制骨架 return vertex_annotator.annotate(annotated_frame, key_points=key_points) #再绘制关节点 sv.process_video( source_path="skiing.mp4", target_path="keypoint_detection.mp4", callback=callback ) ``` <video src="https://media.roboflow.com/supervision/video-examples/how-to/track-objects/track-keypoints-only-keypoints.mp4" controls width="80%"></video> ### 用关节点生成Box范围 官方文档:`https://supervision.roboflow.com/latest/how_to/track_objects/#keypoint-detection`<a id="antiCollectorAdTxt" href="https://github.com/ThisisGame/supervision_book">「supervision book」是一本开源电子书,PDF/随书代码/资源下载: https://github.com/ThisisGame/supervision_book</a> 上面利用`yolov8m-pose.pt`模型来识别人物Pose,并且拿到了关节点`key_points`,那么现在可以利用这些关节点数据生成包围盒。 ```python #file:files\supervision\keypoint_detection_box_annotator.py ## 检测人物骨骼、关节点,并绘制骨架 import numpy as np import supervision as sv from ultralytics import YOLO model = YOLO("yolov8m-pose.pt") edge_annotator = sv.EdgeAnnotator() #边的标注器 vertex_annotator = sv.VertexAnnotator() #点的标注器 box_annotator = sv.BoxAnnotator() #边框标注器 def callback(frame: np.ndarray, _: int) -> np.ndarray: results = model(frame)[0] key_points = sv.KeyPoints.from_ultralytics(results) #从YOLO获取识别到的关节点 detections = key_points.as_detections() #将关节点转换为检测对象 annotated_frame = edge_annotator.annotate(frame.copy(), key_points=key_points) #先绘制骨架 annotated_frame = vertex_annotator.annotate(annotated_frame, key_points=key_points) #再绘制关节点 return box_annotator.annotate(annotated_frame, detections=detections) # 绘制边框 sv.process_video( source_path="skiing.mp4", target_path="keypoint_detection_box_annotator.mp4", callback=callback ) ``` <video src="https://media.roboflow.com/supervision/video-examples/how-to/track-objects/track-keypoints-converted-to-detections.mp4" controls width="80%"></video> ### 绘制轨迹 在识别完关节点后,还可以追踪运动轨迹。 ```python #file:files\supervision\keypoint_detection_and_tracking.py ## 检测人物骨骼、关节点,并绘制骨架 import numpy as np import supervision as sv from ultralytics import YOLO model = YOLO("yolov8m-pose.pt") edge_annotator = sv.EdgeAnnotator() #边的标注器 vertex_annotator = sv.VertexAnnotator() #点的标注器 box_annotator = sv.BoxAnnotator() #边框标注器 tracker = sv.ByteTrack() trace_annotator = sv.TraceAnnotator() def callback(frame: np.ndarray, _: int) -> np.ndarray: results = model(frame)[0] key_points = sv.KeyPoints.from_ultralytics(results) #从YOLO获取识别到的关节点 detections = key_points.as_detections() #将关节点转换为检测对象 detections = tracker.update_with_detections(detections) #跟踪检测对象 annotated_frame = edge_annotator.annotate(frame.copy(), key_points=key_points) #先绘制骨架 annotated_frame = vertex_annotator.annotate(annotated_frame, key_points=key_points) #再绘制关节点 annotated_frame = box_annotator.annotate(annotated_frame, detections=detections) # 绘制边框 return trace_annotator.annotate(annotated_frame, detections=detections) # 绘制轨迹 sv.process_video( source_path="skiing.mp4", target_path="keypoint_detection_and_tracking.mp4", callback=callback ) ``` <video src="https://media.roboflow.com/supervision/video-examples/how-to/track-objects/track-keypoints-with-tracking.mp4" controls width="80%"></video> ### 平滑处理 上面检测了人物的骨骼关节点、使用Box进行标注、并且绘制了追踪曲线。 但是每一帧之间的关节点坐标变化较大,导致Box和追踪曲线不够平滑。 现在来添加平滑处理。 ```python #file:files\supervision\keypoint_detection_and_tracking_smoothing.py import numpy as np import supervision as sv from ultralytics import YOLO model = YOLO("yolov8m-pose.pt") edge_annotator = sv.EdgeAnnotator() #边的标注器 vertex_annotator = sv.VertexAnnotator() #点的标注器 box_annotator = sv.BoxAnnotator() #边框标注器 tracker = sv.ByteTrack() smoother = sv.DetectionsSmoother()#平滑器 trace_annotator = sv.TraceAnnotator() def callback(frame: np.ndarray, _: int) -> np.ndarray: results = model(frame)[0] key_points = sv.KeyPoints.from_ultralytics(results) #从YOLO获取识别到的关节点 detections = key_points.as_detections() #将关节点转换为检测对象 detections = tracker.update_with_detections(detections) #跟踪检测对象 detections = smoother.update_with_detections(detections) #平滑检测对象 annotated_frame = edge_annotator.annotate(frame.copy(), key_points=key_points) #先绘制骨架 annotated_frame = vertex_annotator.annotate(annotated_frame, key_points=key_points) #再绘制关节点 annotated_frame = box_annotator.annotate(annotated_frame, detections=detections) # 绘制边框 return trace_annotator.annotate(annotated_frame, detections=detections) # 绘制轨迹 sv.process_video( source_path="skiing.mp4", target_path="keypoint_detection_and_tracking_smoothing.mp4", callback=callback ) ``` <video src="https://media.roboflow.com/supervision/video-examples/how-to/track-objects/track-keypoints-with-smoothing.mp4" controls width="80%"></video> ### 关于性能 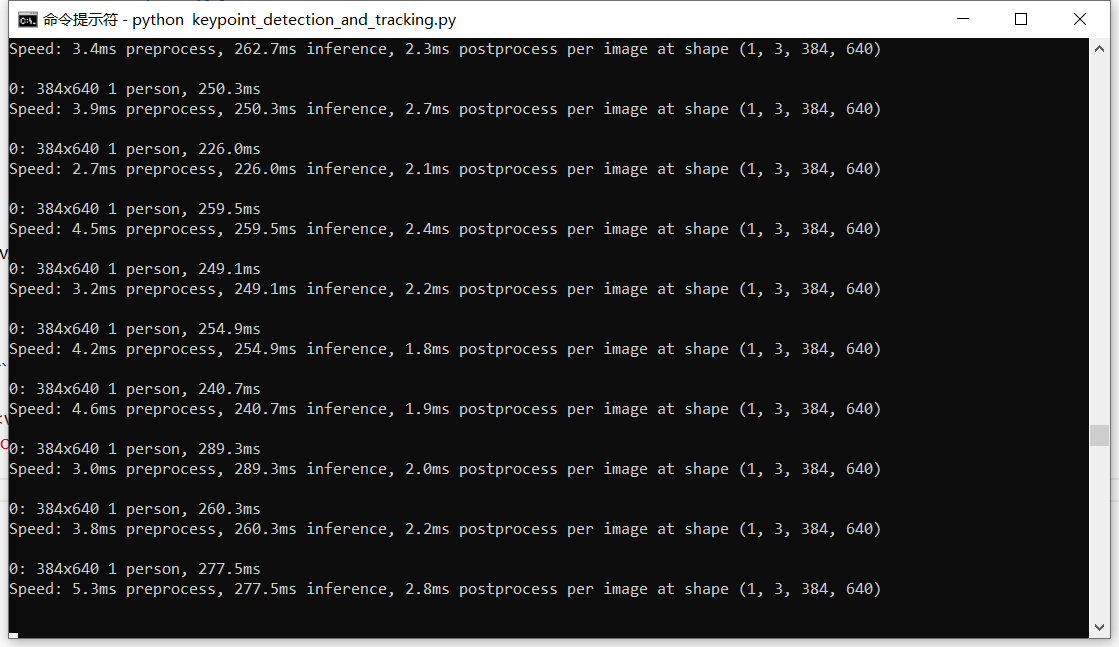 代码运行过程中,会打印出对每一帧图片的处理耗时。 ```txt 0: 384x640 2 persons, 171.3ms Speed: 1.5ms preprocess, 171.3ms inference, 1.4ms postprocess per image at shape (1, 3, 384, 640) ``` 这是对一张图片进行处理打印出来的信息,下面分别来看。 第一行: ```txt 0: 384x640 2 persons, 171.3ms ``` 表示将这一帧图片以`384x640`分辨率进行处理。 是的,YOLO并不会将图片以分辨率进行处理,而是以训练模型时的分辨率尺寸进行处理。 YOLO训练时使用了640的分辨率,那么在进行处理时,会将传入的图片宽高较大的那个缩放成640,然后保持宽高比。  实际上滑雪视频是1920x1080分辨率的,这里就进行了缩小到384x640。 然后YOLO识别到了图片上有`2 persons`,两个人。 识别耗时为`171.3ms`。 第二行: ```txt Speed: 1.5ms preprocess, 171.3ms inference, 1.4ms postprocess per image at shape (1, 3, 384, 640) ``` `1.5ms preprocess` 表示预处理花了`1.5ms`。 `171.3ms inference` 表示模型接口(这里是YOLO)花了`171.3ms`。 `1.4ms postprocess per image at shape (1, 3, 384, 640)` 表示SuperVision对识别到的人物进行标注,花了`1.4ms`。
<< 1.4 检测小物体
1.6 处理数据集 >>
12
代码资源下载
点我下载
Github
点赞、收藏、关注
目录
Introduction
Introduction
前言
前言
1. SuperVision介绍
1. SuperVision介绍
1.1 使用Box和Label标记图片物体
1.2 导出检测结果
1.3 过滤检测结果
1.4 检测小物体
1.5 踪视频中的对象
1.6 处理数据集